Hey there, crafty friends! Get ready to whip up some cozy, campfire-inspired cuteness with our Crochet S’mores Amigurumi Free Patterns! Imagine a perfectly plump, golden-brown marshmallow, nestled between two soft, chocolatey squares and hugged by a fluffy, toasted bun. These adorable little amigurumi treats are so much fun to make and even more delightful to behold!
Whether you’re a crochet beginner looking for your next sweet project or a seasoned pro seeking a charming addition to your home decor, these patterns are for you. They also make the most heartwarming, handmade gifts for anyone who loves a touch of whimsy! In this DIY Magazine feature, we’ll guide you step-by-step through creating your own irresistible s’mores, teaching you essential amigurumi techniques that you’ll use again and again. Let’s get stitching and bring some delicious fun into your crochet world!

Craft Your Own Sweetest Dreams: A Guide to the Crochet S’mores Amigurumi Free Patterns
There’s something undeniably charming about a s’more. That perfect combination of gooey marshmallow, rich chocolate, and crisp graham cracker is a childhood classic, evoking warmth, campfires, and sweet, sticky memories. Now, imagine capturing that cozy delight in a huggable, cuddly form! The Crochet S’mores Amigurumi Free Patterns from DIY Magazine offer exactly that – a delightful opportunity to crochet your very own adorable s’mores characters. Whether you’re a seasoned amigurumi artist or a curious beginner looking to dive into the world of plush crochet, these patterns are a fantastic starting point. Let’s unpack everything you need to know to bring these sweet treats to life.
Gathering Your Supplies: The Perfect Yarn and Hook Combo
The secret to creating well-defined and huggable amigurumi lies in choosing the right yarn and hook. For these s’mores, we’ll be working with medium-weight yarn, often referred to as Worsted Weight or Aran Weight. This weight provides a good balance between stitch definition and plushness, making your s’mores look delightfully squishy without being too stiff or too floppy.
Yarn Recommendations:
Acrylic Yarn: This is a fantastic choice for amigurumi, especially for beginners. It’s durable, washable, readily available in a rainbow of colors, and relatively inexpensive. Look for brands like Red Heart Super Saver, Caron Simply Soft, or Bernat Premium.
Cotton Blend Yarn: For a slightly softer feel and a matte finish, consider cotton blends. They offer good stitch definition but can be a bit less forgiving for beginners.
Color Palette: You’ll primarily need colors that represent the s’more components:
Graham Cracker: A light to medium brown, or a creamy tan.
Marshmallow: White or a very pale ivory.
Chocolate: A rich brown or dark brown.
Hook Size:
The pattern will typically recommend a crochet hook size that complements the chosen yarn weight. For medium-weight yarn, a 3.5mm (E/4) to 4.5mm (7) crochet hook is usually ideal. Using a hook size slightly smaller than what the yarn label suggests is a common amigurumi technique. This creates tighter stitches, preventing the stuffing from showing through and giving your amigurumi a neat, polished appearance.
Mastering the Magic: Essential Stitch Techniques
Amigurumi relies on a few core crochet stitches, and these s’mores patterns are no exception. Don’t be intimidated if you’re new to these; they are surprisingly easy to learn!
Magic Ring (or Magic Circle): This is the foundation of most amigurumi pieces, creating a tight, adjustable loop to start your rounds. It ensures there are no gaps at the center of your work, giving a professional finish.
Single Crochet (sc): The workhorse of amigurumi! This stitch forms the dense fabric needed for stuffed toys.
Increase (inc): Typically worked as two single crochets in the same stitch. This is how you’ll gradually widen your pieces.
Decrease (dec): Most commonly, the invisible decrease is used. This involves working a single crochet into the front loops of two stitches. It creates a neater decrease than a standard decrease, minimizing holes.
Slip Stitch (sl st): Used to join rounds or to move your yarn to a different position.
Chain (ch): The basic building block for starting rows or creating decorative elements.
Tips for the Aspiring S’more Creator: A Beginner’s Guide
Embarking on your first amigurumi project can feel daunting, but these s’mores are designed to be approachable for newcomers. Here are some tips to help you succeed:
Read Through the Pattern First: Before you pick up your hook, read the entire pattern from start to finish. Familiarize yourself with the terms and the general construction.
Use a Stitch Marker: This is your best friend in amigurumi! Place a stitch marker in the first stitch of each round. Since amigurumi is worked in continuous rounds (spirals), it’s crucial to know where each round begins and ends to avoid losing count.
Stuffing Matters: Don’t overstuff, but don’t understuff either! You want your s’mores to be firm enough to hold their shape but still have a gentle, huggable squish. Stuff as you go, adding small amounts of polyester fiberfill (the common stuffing material) as you crochet.
Tension is Key: Try to maintain consistent tension throughout your work. If your stitches are too loose, the stuffing will show. If they’re too tight, your fabric will be stiff and difficult to work with.
Embrace Imperfection: Your first s’mores might not be perfectly symmetrical, and that’s okay! The beauty of handmade items is their unique character. Each slightly wonky stitch tells a story of your learning journey.
Practice the Magic Ring and Invisible Decrease: Spend a few minutes practicing these techniques with scrap yarn before you start your s’mores. This will build your confidence.
Personalize Your Sweet Treat: Customization Ideas
The beauty of amigurumi is the endless potential for customization. These s’mores patterns are a blank canvas for your creativity!
Color Play:
Unique Graham Crackers: Experiment with speckled yarns to mimic a more rustic graham cracker texture. You could even try a very pale yellow for a different cracker variety.
“Gourmet” Chocolate: Use a variegated yarn with hints of caramel or white chocolate swirls for a more sophisticated chocolate square.
“Fruity” Marshmallows: Add a pop of color by crocheting striped marshmallows or using a very pale pink or yellow for a “strawberry” or “lemon” marshmallow variation.
Size Adventures:
Mini S’mores: Use a finer weight yarn (sport or DK) and a smaller hook (e.g., 2.5mm or 3mm). This will result in tiny, adorable s’mores perfect for keychains or miniature scenes.
Jumbo S’mores: Opt for chunky or super chunky yarn and a larger hook (e.g., 6mm or 8mm). You’ll create impressively large, huggable s’mores that are sure to be a statement piece.
Adding Details:
Embroidered Faces: Use black embroidery floss to stitch simple, cheerful faces onto your marshmallow pieces. You can make them sleepy, smiling, or surprised!
“Toasted” Marshmallows: Lightly brush the edges of your white marshmallow pieces with a brown watercolor paint or fabric marker to give them a subtle “toasted” effect. Be very sparing with this and test on a scrap piece first!
Decorative Stitching: Add French knots or small embroidered details to the chocolate or graham cracker pieces for texture.
Keeping Your S’mores Cuddly: Care Instructions
These crocheted s’mores are designed to be loved and played with, but like all handmade items, they require a little care to keep them looking their best.
Washing: For most acrylic or cotton blend yarns, gentle handwashing is the best option. Fill a sink with cool water and a small amount of mild detergent. Gently swish the s’more in the water, focusing on any soiled areas. Avoid vigorous scrubbing. Rinse thoroughly with cool water.
Drying: Never put amigurumi in a dryer! The heat can melt the stuffing and distort the stitches. Gently squeeze out excess water (don’t wring!). Roll the s’more in a clean, dry towel to absorb more moisture. Then, reshape the s’more and lay it flat on a drying rack or on a clean, dry towel in a well-ventilated area. Allow it to air dry completely.
Spot Cleaning: For minor spills or marks, you can often get away with spot cleaning using a damp cloth and a tiny bit of mild soap.
Beyond the Basic: Fun Project Ideas
Once you’ve mastered the basic s’more, the possibilities are endless!
S’mores Garland: Crochet a series of s’mores and string them together to create a delightful festive garland for camping-themed parties or a child’s bedroom.
S’mores Keychain: Make smaller versions and attach a keychain ring to create adorable, portable companions.
S’mores Play Food: If you’re making these for children, consider adding them to a play kitchen or a pretend campfire setup for hours of imaginative play.
S’mores Plushie Collection: Create a whole family of s’mores with different expressions and color variations.
Gifting: A handmade s’mores amigurumi makes a thoughtful and unique gift for birthdays, holidays, or just because!
The Crochet S’mores Amigurumi Free Patterns are more than just a craft project; they’re an invitation to a world of sweetness and creativity. With a bit of yarn, a hook, and these helpful tips, you’ll be well on your way to crocheting a batch of these utterly delightful s’mores that are sure to bring smiles and warm hugs. Happy crocheting!
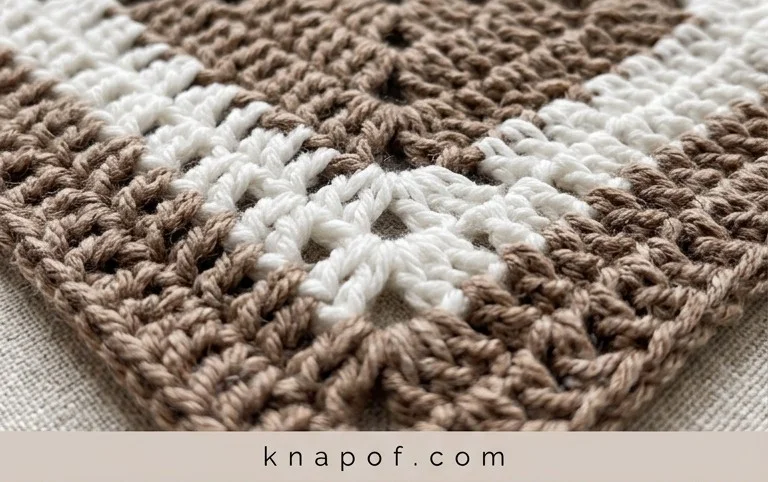
Aren’t these little s’mores just the sweetest?
We hope you’ve been inspired to grab your hook and yarn and bring these adorable amigurumi treats to life! They’re the perfect project for adding a touch of cozy fun to your decor or gifting to a fellow craft lover. Don’t forget to share your finished s’mores on social media using #CrochetSmores and tag us – we can’t wait to see your creations! Feel free to get creative with different colored yarns for the marshmallow or even add tiny embroidered chocolate chips. Ready for your next yarn adventure? Explore more of our delightful crochet patterns!